
Aerial Drone Photography Tips: Mastering the Sky
Have you ever pondered on the perspective birds have of the world below? From the vantage points of planes, hot air balloons, and helicopters, the scenery beneath has consistently mesmerized us. Now, with drones, we can navigate vast landscapes, soar over mountain summits, glide along infinite coastlines, and hover above bustling towns. The art of capturing such aerial moments opens up boundless opportunities. Dive into these aerial drone photography tips and embark on a journey to craft mesmerizing images from above.
Introduction to Aerial Drone Photography
Drones have revolutionized photography, giving enthusiasts the chance to explore perspectives previously reserved for birds. But why are aerial shots so captivating?
The Rise of Drones
Gone are the times when capturing aerial perspectives required costly helicopters and specialized gear. Drone cameras have revolutionized this space. Now, with a few hundred dollars, you can own your mini aerial studio!
Significance of Aerial Shots in Photography
In both landscape photography and wildlife photography, aerial shots present a distinct viewpoint, unveiling patterns, textures, and terrains in unparalleled ways. Drone cameras breathe vitality into our visual stories, rendering them more dynamic and captivating, especially when incorporating video elements.
Best Aerial Drone Photography Tips: Capturing the Perfect Shot
The thrill of flying is one thing, but capturing that perfect shot? That's where the magic lies.
Aerial Drone Photography Tips for Beginners: Composition

Understanding Composition: Composition refers to how elements are arranged within the frame. Familiarize yourself with these techniques:
The rule of thirds divides an image into nine equal parts using two horizontal and two vertical lines, creating intersecting points. Placing key elements along these lines or their intersections can create a balanced and visually pleasing composition.
Leading lines act as visual pathways, directing the viewer's gaze into the image, often leading towards the main subject or a focal point. In drone photography, roads, rivers, fences, or even shadows can serve as leading lines, drawing viewers deeper into the scene.
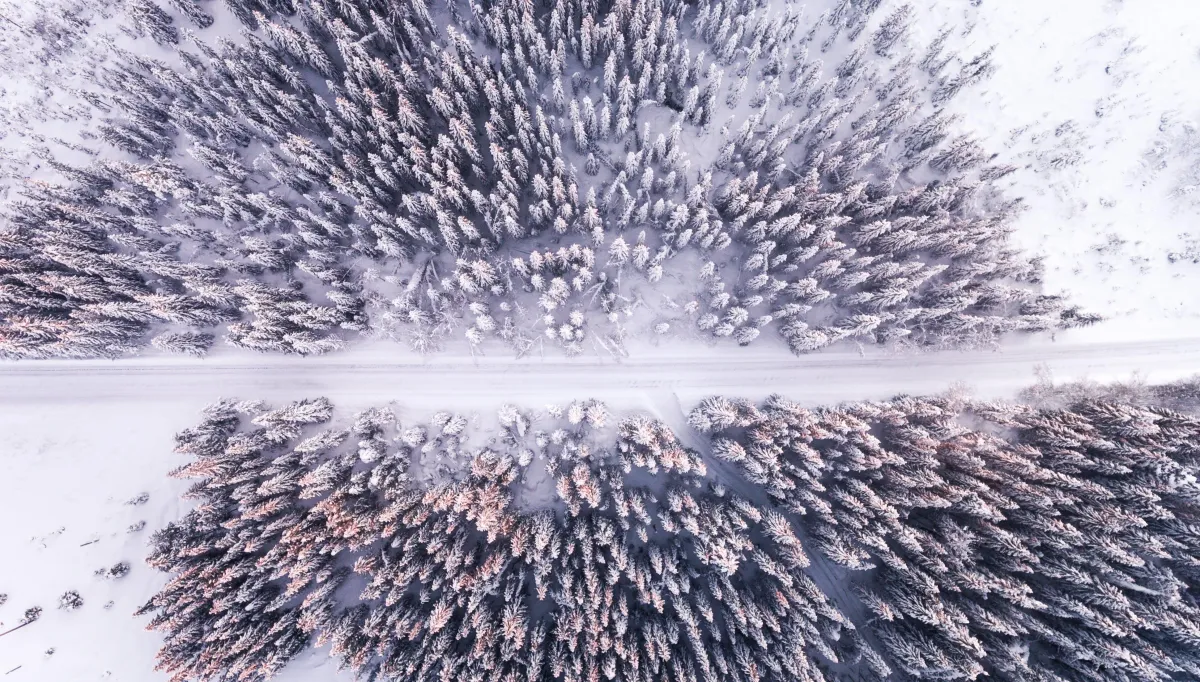
Patterns are created by the repetition of shapes, colors, or textures within a frame. In drone photography, agricultural fields, urban rooftops, or natural formations like sand dunes can form captivating patterns when viewed from above.
Symmetry involves mirroring elements across a central axis, creating a sense of balance and harmony in your images. In drone photography, symmetrical landscapes, architectural structures, or reflections on water bodies can be particularly striking.
Foreground and Background: Incorporating a strong foreground can add depth to your shots, drawing viewers into the scene. Meanwhile, the background should complement the main subject, ensuring a harmonious balance in the image.
The foreground can provide valuable context and scale for the main subject or focal point in the background. Incorporating foreground elements, such as rocks, trees, or structures, can add layers to your composition. By adding these elements, you can emphasize the significance of the subject and enhance the perceived depth and dimensionality of the scene.
The background serves to complement and enhance the foreground, creating a cohesive and harmonious composition. The background elements, such as distant landscapes, skies, or architectural features, play a crucial role in establishing the atmosphere and ambiance of the scene. They contribute to the overall mood, whether it's a serene sunrise, a bustling urban skyline, or a dramatic stormy sky.
Achieving a harmonious balance between foreground and background requires careful composition and consideration of how these elements interact. Look for complementary shapes, textures, and colors that create a unified and visually appealing image.
Utilizing foreground and background effectively can create a sense of depth and layering within the frame. This multidimensional approach adds richness and complexity to the composition, encouraging viewers to explore and engage with the image on multiple levels.
Aerial Drone Photography Tips: Understanding Light

Quality of Light:
Soft, diffused light, often found during the golden hour, creates gentle transitions between shadows and highlights, enhancing textures and adding a warm glow. In contrast, harsh, direct sunlight can result in strong contrasts, potentially leading to overexposed highlights or underexposed shadows.
The angle at which light strikes your subject influences its visual presentation. Side lighting can accentuate textures and create depth, while backlighting can produce silhouettes or halo effects, adding drama and intrigue to your images.
Color Temperature:
The color temperature of light influences the overall color palette of your photos. Warm hues, prevalent during sunrise and sunset, infuse images with a golden, ethereal quality. In contrast, cool, bluish tones, often seen during the blue hour or overcast conditions, evoke a sense of tranquility and serenity.
Timing is Crucial:
Often hailed as the best time for photography, the golden hour occurs shortly after sunrise and before sunset. The soft, golden light during this time bathes scenes in a warm glow, enhancing colors, and textures, creating a magical ambiance. To capitalize on this, plan your flights around these times, adjusting your drone's altitude and position to capture the optimal light.
The period just before sunrise and after sunset, known as the blue hour, offers a unique color palette with soft, diffused light and cool, bluish tones. Experiment with longer exposures to capture the serene, dreamlike quality of this fleeting moment.
Embrace Shadows:
Shadows can add depth, drama, and a sense of mystery to your images. Embrace the interplay of light and shadow, experimenting with different angles and perspectives to create compelling compositions.
Use backlighting to capture striking silhouettes, where the subject appears as a dark outline against a brighter background. This technique can be particularly effective during sunrise or sunset, adding a sense of intrigue and storytelling to your photos.
Adapt to Changing Conditions:
Be prepared to adapt your approach based on weather conditions and atmospheric phenomena. Cloud formations, fog, rain, or snow can dramatically transform a scene, offering unique opportunities for creative expression. Monitor weather forecasts and be willing to seize unexpected moments of beauty and drama.
Experiment and Explore:
Don't be afraid to experiment with different lighting conditions, camera settings, and compositional techniques. Each flight offers a new perspective and potential for discovery. Embrace the freedom and versatility of drone photography, exploring diverse locations, perspectives, and creative visions.
Explore time-lapse sequences to document the gradual shifts in a scene, revealing the dynamic range of light and shadow over extended periods. This technique offers a mesmerizing portrayal of time's progression and the nuanced changes within the scene's dynamic range.
Aerial Drone Photography Tips: Camera Settings
Exposure Triangle:
Adjusting the aperture controls the amount of light entering the lens and affects the depth of field. A wider aperture (smaller f-number) produces a shallower depth of field, blurring the background and emphasizing the subject. For landscape shots, a smaller aperture (larger f-number) is often preferred to ensure that both foreground and background are in sharp focus.
The shutter speed determines the duration for which the camera's sensor is exposed to light. A faster shutter speed freezes motion and is ideal for capturing fast-moving subjects or maintaining sharpness in windy conditions. Conversely, a slower shutter speed introduces motion blur, creating a sense of movement and fluidity in the image.
The ISO setting modifies the light sensitivity of the sensor. ISO 100 is suitable for well-lit conditions, producing images with minimal noise. In low-light situations, increasing the ISO can brighten the image, but be mindful of potential graininess or loss of detail at higher ISO values.
Focus and Metering:
While auto-focus is convenient, especially for capturing dynamic scenes, consider utilizing manual focus for more precise control over the focal point. This is particularly useful for achieving tack-sharp images of static subjects or when utilizing specific focusing techniques such as hyperfocal distance.
Experiment with different metering modes (e.g., spot metering, center-weighted, evaluative) to accurately measure and adjust exposure based on the scene's lighting conditions and the desired outcome.
Additional Camera Settings and Techniques

Additional Camera Settings:
Always use RAW format when you anticipate needing extensive post-processing. RAW files retain more data and provide greater flexibility during editing, especially in adjusting exposure, white balance, and recovering details from shadows and highlights. Tip: Ensure you have ample storage space as RAW files are larger than JPEGs.
Use Auto Exposure Bracketing (AEB) in scenes with high contrast, such as sunsets or backlit subjects. It captures multiple shots at different exposures, ensuring you capture details in both shadows and highlights. Tip: Use a tripod mode for consistent results and consider using HDR techniques in post-processing to merge AEB shots for optimal dynamic range.
Experiment with long exposure images that can capture dynamic motion blur effects, such as flowing water or moving clouds, adding a sense of movement and fluidity to your aerial shots. Tip: Utilize ND filters to reduce light intake and achieve longer exposure times without overexposing the image.
Intelligent Flight Functions:
Drones equipped with intelligent flight functions leverage advanced onboard technologies to enhance the flying experience and capture capabilities.
Waypoint Navigation allows users to set specific flight paths by selecting waypoints on a map. The drone will autonomously navigate along the predetermined route, enabling precise and repeatable shots.
Capture panoramic shots in expansive landscapes or urban cityscapes where a single frame cannot encapsulate the scene's grandeur.
Capture unique perspectives with drone selfies showcasing both the photographer and the stunning aerial backdrop, adding a personal touch to your aerial photography portfolio.
Engaging tripod mode stabilizes your drone, minimizing vibrations and ensuring sharper images, especially during longer exposure times or in windy conditions.
Utilize cinematic shots to tell a story or evoke emotions through your drone footage. Use techniques like dolly zooms, tracking shots, or aerial reveals to create visually engaging sequences. Tip: Plan your shots in advance, storyboard your sequence, and practice your drone piloting skills to achieve smooth and cinematic footage.
ND Filters or Neutral Density filters help control and balance the amount of light entering the lens, allowing for longer exposure times or wider apertures in bright conditions, enhancing creativity and achieving desired exposure effects. Tip: Have a variety of ND filters (e.g., ND4, ND8, ND16) to adapt to different lighting conditions.
Aerial Drone Photography Tips: Angles and Perspectives

Bird's-Eye View:
Embracing a high-angle viewpoint, often referred to as the bird's-eye view, allows you to capture sweeping vistas, expansive landscapes, and intricate patterns that may be obscured or overlooked from ground level. This perspective offers a sense of scale, revealing the grandeur and interconnectedness of the scene below.
Low-Level Angles:
Flying closer to the ground and adopting a low-level perspective enables you to focus on intimate details, textures, and patterns. This approach can emphasize the unique characteristics of the terrain, such as rugged landscapes, winding pathways, or intricate natural formations, creating a sense of depth and engagement.
Oblique and Diagonal Angles:
Experiment with oblique and diagonal angles to introduce dynamic energy and movement into your images. Tilting the drone and capturing scenes from skewed perspectives can add a sense of drama, intrigue, and visual interest, encouraging viewers to explore and interpret the composition from various angles.
Aerial Drone Photography Tips: Post Processing

Raw Processing:
Begin by importing your drone's raw images into specialized editing software, such as Final Cut Pro, Adobe Premiere Pro, and DaVinci Resolve. Raw files retain the maximum amount of data captured by the sensor, providing greater flexibility and control over exposure, color, and detail adjustments.
Fine-tune exposure and contrast to balance highlights and shadows, ensuring a well-exposed image with a full range of tones. Utilize graduated filters or adjustment brushes to selectively enhance specific areas, preserving details and minimizing overexposure or underexposure.
Color and White Balance:
Adjust the white balance to correct any color casts and ensure accurate representation of colors. Experiment with color grading and calibration to evoke specific moods, emphasize certain hues or harmonize the overall color palette of the image.
Enhance vibrance and saturation to amplify the colors and bring the scene to life, but exercise restraint to maintain a natural and balanced appearance. Targeted adjustments can be applied to specific color ranges, allowing for precise control and creative expression.
Detail Enhancement:
Apply sharpening and clarity adjustments to enhance detail and texture, bringing out the intricacies of the landscape, architecture, or subjects within the frame. Be mindful of introducing artifacts or noise, and utilize masking techniques to selectively apply these enhancements to relevant areas of the image.
Address any noise or graininess, particularly in images captured at higher ISO settings or in low-light conditions. Utilize noise reduction algorithms and techniques to preserve detail while achieving a smoother and more refined appearance.
Creative Effects and Styling:
Introduce vignetting or graduated filters to draw focus to the subject, create a sense of depth, or enhance the overall mood of the image. Experiment with creative effects, such as split toning, film emulations, or texture overlays, to infuse your images with a distinctive style and aesthetic signature.
Explore composite techniques and montage compositions to combine multiple exposures, elements, or perspectives into a cohesive and visually compelling narrative. This approach allows for greater creative freedom and the ability to transcend conventional boundaries, crafting images that transcend reality and resonate on a deeper, more emotive level.
Consistency and Cohesion:
Develop a consistent post-processing workflow and create custom presets or templates to streamline your photo editing process, maintain visual coherence across a series or portfolio of images, and ensure a harmonious and cohesive presentation of your work.
Seek constructive feedback, regularly review and refine your post-processing techniques, and remain open to experimentation and continuous learning. Embrace the iterative nature of the creative process, and strive to evolve and grow as a photographer and visual storyteller.
Aerial Drone Photography Tips: Feedback and Learning
Community Engagement:
Joining photography communities, both online and offline, can provide valuable feedback, inspiration, and learning opportunities. Engage with fellow enthusiasts, share insights, and embrace continuous growth as a photographer.
Analyzing and Reflecting:
Regularly review your work, analyzing what works well and areas for improvement. Reflecting on your shots, understanding the decisions behind them, and seeking constructive feedback can foster growth and refinement in your craft.
Storage and Backing Up
High-quality aerial shots can consume significant storage. Always have a backup system in place, be it cloud storage or external hard drives.
Planning and Researching the Location
Utilize platforms such as suncalc.org which monitors the trajectory of the sun, to effortlessly plan your photography sessions based on your preferred time of day for shooting. Additionally, Google Earth provides drone photographers with a comprehensive tool for scouting locations, assessing terrain, and planning precise flight paths based on detailed 3D imagery and environmental insights. Tip: Check local regulations and obtain necessary permits or permissions for drone flights in certain areas.
Choosing the Right Drone
Not all drones are created equal. Depending on your goals and budget, there's a perfect match out there.
Budget-friendly Options
If you're just getting started and need an entry-level option, there are affordable drones equipped with essential features and a reliable drone camera that ensure decent image quality without compromising performance. The DJI Mini 3 or DJI Mini 2 SE serves as excellent entry-level options on a budget.
Advanced Capabilities to Consider
For seasoned photographers, drones with advanced stabilization, longer flight times, and higher resolution cameras are game-changers. Investing a bit more here can elevate your shots exponentially. Drones like the DJI Mini 3 Pro, DJI Air 2S, DJI Air 3, DJI Phantom 4 Pro, or DJI Mavic 3 Pro are poised to elevate your creative endeavors.
Prioritize Safety
Before launching your drone into the air, thorough preparation is essential. In this article, we delve into regulations, registration procedures, pre-flight checklists, and overarching drone safety measures. It's crucial to equip yourself with the knowledge and tools necessary to ensure a safe and responsible drone operation.
Essential Equipment
Ensure you have spare batteries, propellers, neutral density filters, and an SD card. A drone's flight can be cut short by a dead battery or full storage, so always come prepared.
Aerial Drone Photography Tips: Conclusion
Aerial photography isn't just about technology; it's about vision. With the right tools, mindset, and a dash of creativity, the sky isn't the limit – it's just the beginning. As photographers ascend higher, they gain a unique perspective that unveils a world of untapped beauty and wonder. Embracing this perspective allows for storytelling that transcends traditional boundaries, capturing moments that are both breathtaking and transformative. Through the lens of aerial photography, we're reminded that there's always a new horizon to explore and a fresh narrative waiting to be told.
Aerial Drone Photography Tips: FAQs
1. How can I improve my aerial photography?
To enhance your aerial photography, focus on composition, lighting, and post-processing techniques. Experiment with different angles, utilize leading lines, and consider the rule of thirds to create compelling compositions. Additionally, continuous practice and experimentation will refine your skills over time.
2. How do I get sharp pictures on my drone?
To capture sharp images, ensure that your drone is stable and minimize vibrations. Use a lower ISO to reduce noise, select an appropriate aperture for depth of field, and adjust the focus manually if your drone allows. Additionally, utilize post-processing sharpening techniques to enhance clarity and detail.
3. What is the best ISO for a drone?
The optimal ISO setting for a drone typically ranges from 100 to 400, as lower ISO values reduce noise and result in cleaner images, especially in well-lit conditions. However, adjust the ISO based on the available light and desired exposure, ensuring a balanced and well-exposed image.
4. What is the best aperture for aerial photography?
For aerial photography, a moderate aperture between f/5.6 and f/8 is often recommended to achieve a balance between depth of field and sharpness. However, adjust the aperture based on the specific scene, subject distance, and desired creative effect.
5. Is 4:3 or 16:9 better for drones?
The choice between 4:3 and 16:9 aspect ratios depends on your specific needs and creative vision. The 4:3 ratio provides a taller frame, capturing more vertical content, while the 16:9 ratio offers a wider, more cinematic look. Select the aspect ratio that best complements your subject, composition, and intended final output.


Copyright © Drone Guide Central - All Rights Reserved 2024